Mechanical Properties
Measuring and understanding the mechanical response is critical for material research, product development, and process control. The mechanical response of these materials is dependent on the application scenarios as well as material chemistry. The main parameters that are considered to measure these mechanical properties are load (P), loading rate or strain rate (Ṗ/ἐ), time of loading (t).
Nanoindentation is conducted on a variety of materials from bio-gels to superalloys to measure hardness and elastic modulus of the material with continuous stiffness measurements (CSM) in addition to complex modulus measurements (storage modulus, loss modulus, loss factor) for polymers, removing substrate effect in thin film properties, 3D property maps for heterogeneous surfaces and 4D property maps for depth-dependent properties of materials. Nanoindentation is capable of conducting dynamic and static microhardness and nanoindentation measurements including nanometric Vickers hardness.
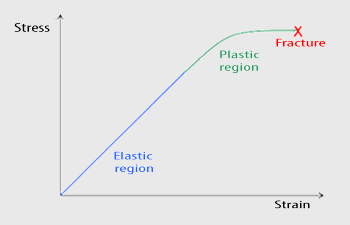
Traditionally, mechanical properties were determined from a stress-strain curve generated by an applied load but nanoindentation has proved to be much more advanced providing multiple properties such as hardness, modulus from a single test in less than a second. Some common terms used in mechanical tests are stress, strain, yield stress. Stress (σ) is the instantaneous load applied to a specimen divided by its cross-sectional area before any deformation. Strain (ε) is the change in gauge length of a specimen divided by its original gauge length. Yield stress (σy) is the stress at the point where the material no longer responds elastically, referred to as the yield point.
From fundamental data, mechanical properties are determined:
- Elastic modulus
- Hardness
- Complex modulus for viscoelastic materials
- Fracture toughness
Elastic Modulus
Two mechanical properties, elastic modulus, and hardness can be determined by nanoindentation.
The elastic modulus (E), often referred to as Young’s modulus is the ratio of stress (σ) to strain (ε) when deformation is totally elastic. In the elastic region, stress and strain are proportional through Hooke’s Law: σ = Eε

The elastic modulus is an intrinsic property of a material. At a fundamental level, E is a measure of the bond strength between atoms. The greater the modulus, the stiffer the material and the smaller the strain. An elastic response is non-permanent, so when an applied load is released, the sample returns to its original shape.
Hardness
Hardness (H) is a measure of a material’s resistance to deformation by surface indentation. The plastic deformation is caused by the motion of dislocations in the atomic structure of a material. The yield strength of a material may be changed by inhibiting dislocation motion through imperfections, alloys or grain boundaries.
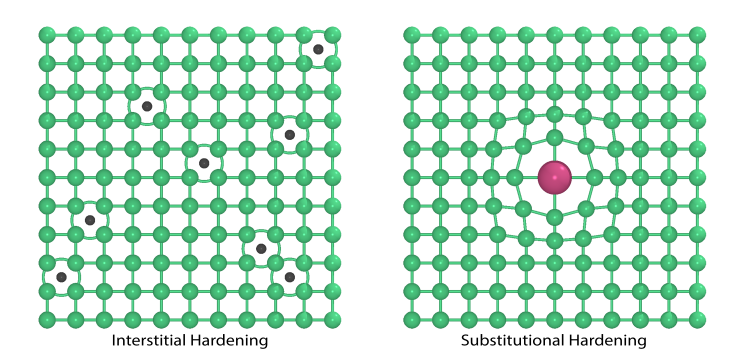
Material hardness can be increased by different means, including interstitial or substitutional hardening, where atoms are either added between or substituted in the atomic lattice:

Microhardness testing and nanoindentation are standard methods of determining hardness. Nanoindentation has the added benefit of also providing elastic modulus.
The hardness of a material is the single most important parameter when designing contacts. The harder material wears down the softer when in contact with each other. In mechanics, hardness is defined as the resistance of a material to permanent deformation during application of load.
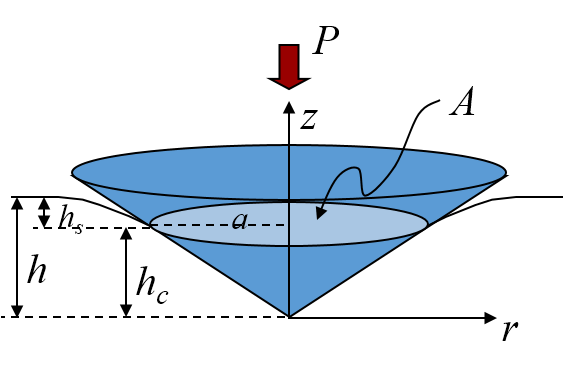
Traditionally, hardness is measured on a relative scale such as Mohs or Vickers hardness. Each material is assigned a numerical value from 1 to 10 based on its relative hardness in Mohs scale. Recent advancement in nanoindentation technology allows the measurement of hardness over a variety of materials and is defined in terms of the area imprinted on a material for a given applied load. The hardness, H, from the nanoindentation method is calculated as:
H = P/A
Here, P is the applied load, A is the indentation area. There are different scales of measurement based on materials such as Shore hardness, Vickers hardness, Mohs hardness, and Knoop hardness to mention few. All of these represent the relative hardness of the material with reference to a standard sample. Nanoindentation removes the ambiguity in different scales by providing a physical measurement in terms of absolute hardness.

Unlike elastic modulus which is an intrinsic property of materials, hardness shows size dependence in materials with near surface hardness being different from the bulk hardness. The continuous stiffness measurement is an excellent technique providing depth dependence measurements to study the size effect of hardness in various materials. The size dependence of hardness can be understood by comparing two alloys made up of same material but different grain sizes. The finer grains lead to higher hardness in most materials because of the compactness of the packing.
Viscoelasticity
Dynamic Mechanical Analysis (DMA) is used for polymers and rubber materials with a fixed geometry. An oscillation is applied during a frequency sweep while the temperature is increased. The complex modulus, the storage and loss modulus combined, is then determined as a function of frequency and temperature.
Storage Modulus (E’) is a measure of the elasticity of a polymer material. Loss Modulus (E”) is a measure of the capacity for a polymer to convert mechanical energy into heat. Loss Factor, referred to as tan δ, is the ratio of E” to E’.
When sample size or function requires a small volume, a dynamic nanoindentation test analogous to DMA is used to determine E’ and E”. Nanoindentation can be used to characterize a larger frequency range than DMA. Less heat can be applied to do the smaller sample size.

Fracture Toughness
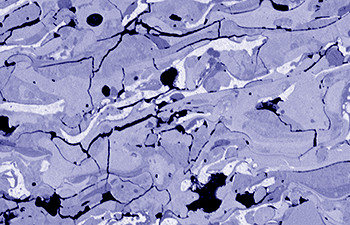
Fracture toughness is the property of a material’s resistance to brittle fracture. Because the occurrence of flaws is impossible to avoid during processing of a material or component, fracture toughness is an important materials property. Materials with high fracture toughness will tend to undergo ductile fracture. Materials with low fracture toughness normally have a brittle fracture.

Models can be used to calculate the fracture toughness and correlate to high load nanoindentation data. Typically these methods consider the flaw size and component geometry and load condition. The fracture toughness is used to evaluate the ability of a component with pre-existing flaws to resist fracture.
